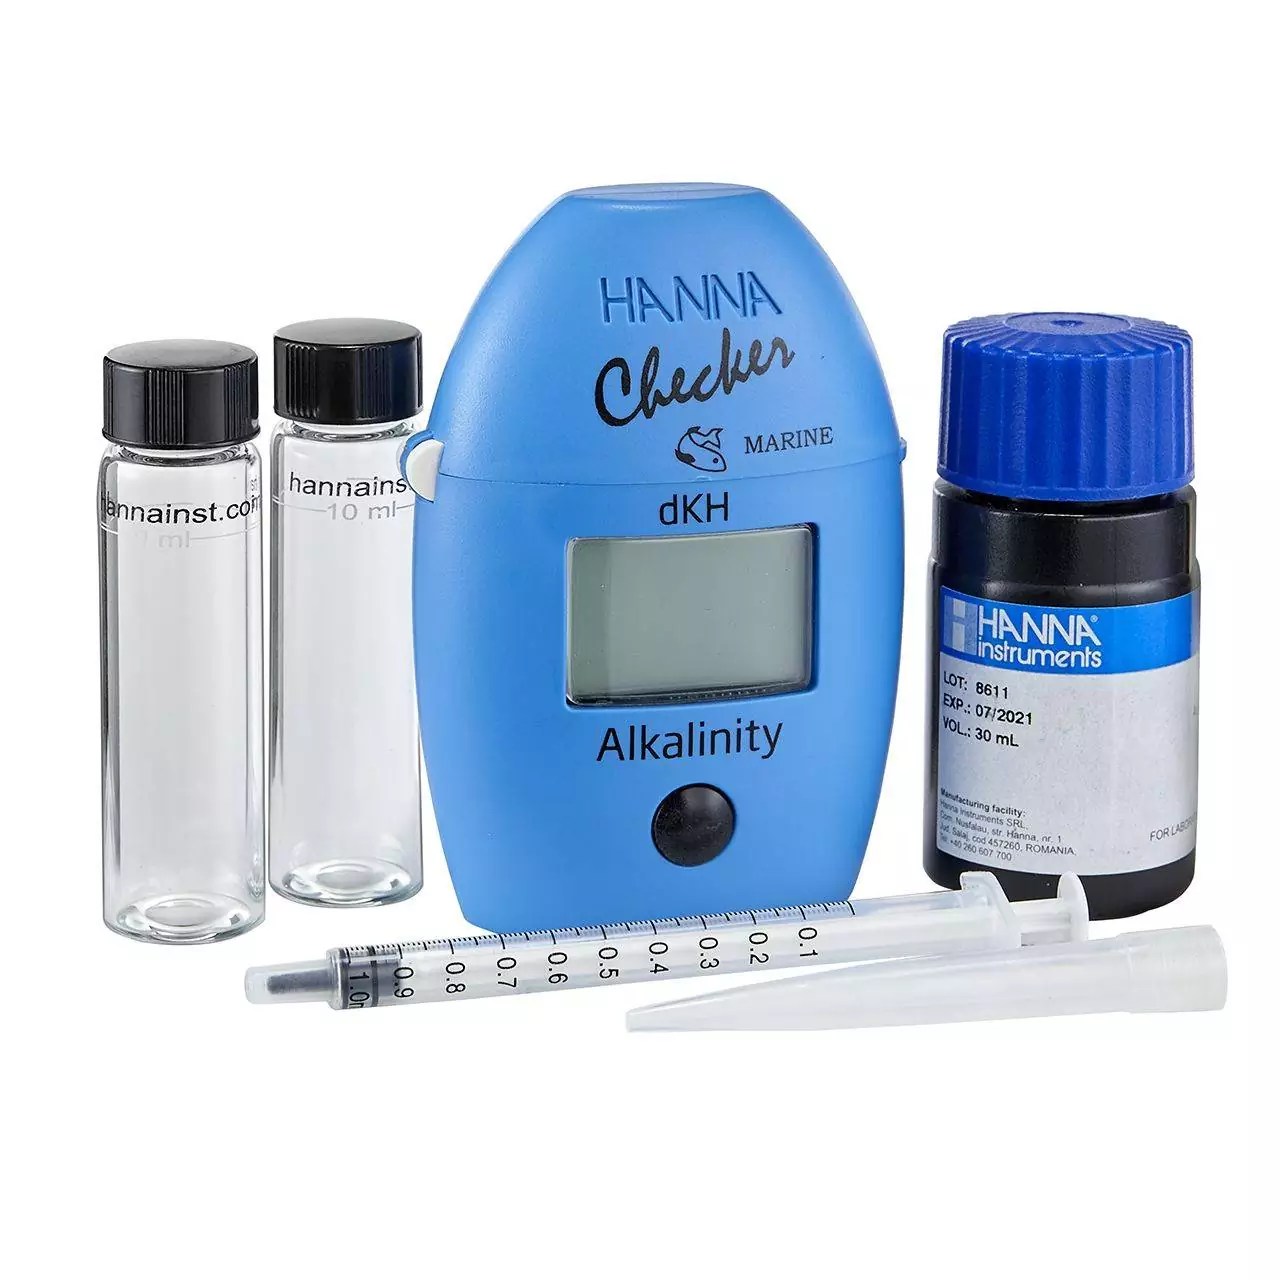
The Hanna Alkalinity Checker is an essential tool for anyone looking to monitor and maintain the water quality in their aquariums, pools, or other aquatic environments. Understanding how to use this device effectively can make a significant difference in maintaining optimal conditions for aquatic life. In this article, we will provide detailed instructions on how to use the Hanna Alkalinity Checker, along with tips and best practices to ensure accurate readings and optimal results.
Water alkalinity plays a crucial role in the health of aquatic ecosystems, and the Hanna Alkalinity Checker is designed to simplify the process of measuring alkalinity levels. This guide will cover everything from setting up the device to interpreting the results, making it accessible for both beginners and experienced users alike.
By the end of this article, you will have a thorough understanding of how to use the Hanna Alkalinity Checker and the importance of maintaining proper alkalinity levels in your water. Whether you are a hobbyist or a professional, this guide aims to enhance your understanding and management of water quality.
Table of Contents
1. Introduction to Hanna Alkalinity Checker
The Hanna Alkalinity Checker is specifically designed to measure the total alkalinity of water. Alkalinity is a critical parameter that affects pH stability and overall water quality. Regular monitoring of alkalinity helps prevent drastic changes in water chemistry, which can be harmful to aquatic life.
2. Overview of Hanna Instruments
Hanna Instruments is a reputable company that specializes in the manufacture of analytical instrumentation. Founded in 1978, the company has established itself as a leader in providing reliable and accurate testing solutions across various industries.
| Data | Details |
|---|---|
| Founded | 1978 |
| Headquarters | Woonsocket, Rhode Island, USA |
| Industry | Analytical Instrumentation |
| Website | www.hannainst.com |
3. Setting Up Your Hanna Alkalinity Checker
To ensure accurate measurements, setting up your Hanna Alkalinity Checker correctly is crucial. Here is a step-by-step guide:
- Unbox the Hanna Alkalinity Checker and ensure all components are present.
- Insert the batteries according to the instructions provided in the manual.
- Calibrate the device if necessary, referring to the calibration section in the user manual.
- Gather your water sample in a clean container.
4. How to Operate the Hanna Alkalinity Checker
Once you have set up your device, follow these instructions for accurate operation:
5. Understanding Your Results
After the measurement is complete, the device will display the alkalinity level in your water sample. Here’s how to interpret the results:
- Low alkalinity levels (below 80 mg/L) can lead to pH fluctuations.
- Ideal alkalinity levels for aquariums typically range between 100-200 mg/L.
- High alkalinity levels (above 200 mg/L) can cause issues with nutrient availability.
6. Maintenance Tips for Longevity
To keep your Hanna Alkalinity Checker in optimal condition, follow these maintenance tips:
- Clean the cuvettes after each use to avoid contamination.
- Store the device in a dry and cool environment.
- Regularly check and replace batteries as needed.
- Refer to the user manual for specific maintenance guidelines.
7. Troubleshooting Common Issues
If you encounter problems while using your Hanna Alkalinity Checker, consider these troubleshooting tips:
- If the device does not turn on, check the battery installation.
- For inaccurate readings, ensure that the cuvette is clean and free of scratches.
- Consult the user manual for error codes and troubleshooting steps.
8. Conclusion and Final Thoughts
In conclusion, the Hanna Alkalinity Checker is a valuable tool for anyone interested in maintaining water quality. By following the instructions outlined in this guide, you can ensure accurate readings and optimal conditions for your aquatic environment. Regular monitoring of alkalinity is essential for the health of your aquatic life, and with the Hanna Alkalinity Checker, this process can be both simple and effective.
We invite you to leave your comments, share this article, and explore our other resources for more information on water quality management.
Thank you for reading! We hope to see you again soon for more insights and tips.
ncG1vNJzZmivp6x7rLHLpbCmp5%2Bnsm%2BvzqZmnKSZoq61sYycn5qml5p6ra3SrWScmZyheqe70WaYnKyZpLtwtMCnpZplkaG4orjIp6CtsV2Ytaavyp6pZqGeqMGzwcKtoKimo2O1tbnL