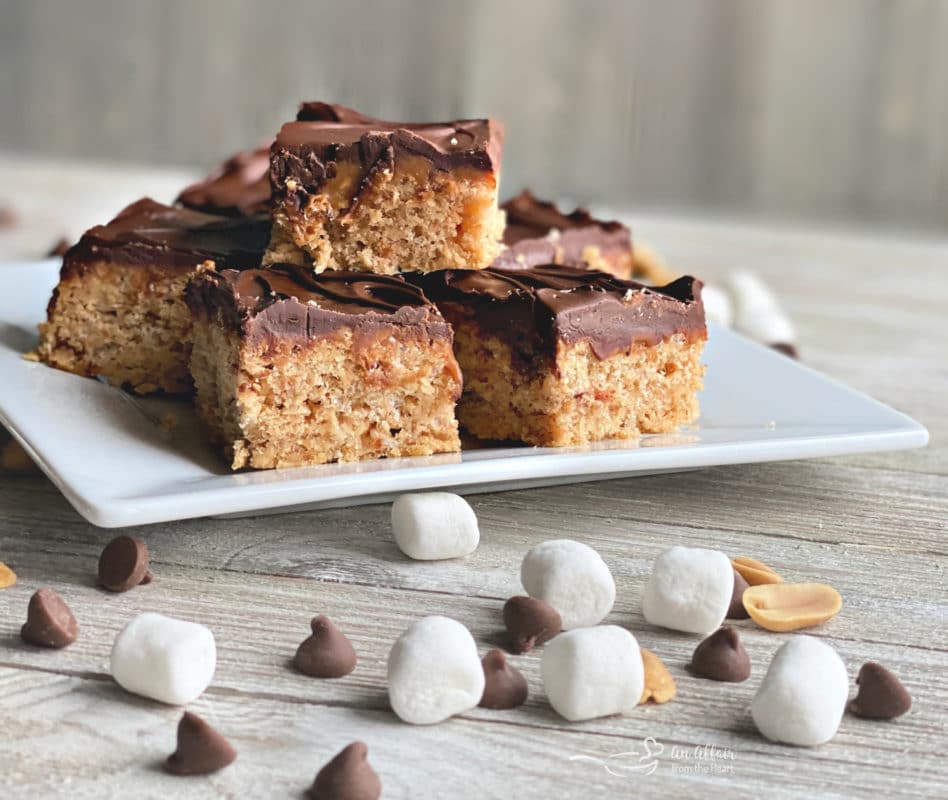
Are you craving a sweet, crunchy, and chocolatey snack? Look no further than the Whatchamacallit bars recipe! These delightful treats combine crispy rice, peanut butter, and chocolate for a flavor explosion that will leave you wanting more. In this article, we will explore the origins of Whatchamacallit bars, provide you with an easy-to-follow recipe, and share tips to make the perfect batch at home.
The Whatchamacallit bar is a beloved candy bar that has been a favorite among chocolate lovers since its introduction in the 1970s. It boasts a unique combination of textures and flavors, making it a great option for dessert, a snack, or even a homemade gift. In this comprehensive guide, we will delve into the step-by-step process of creating your own Whatchamacallit bars, ensuring that you can enjoy this classic treat whenever the craving strikes.
Whether you're looking to impress your friends with your baking skills or simply want to indulge in a sweet treat, our Whatchamacallit bars recipe is sure to satisfy. We will provide you with detailed instructions, helpful tips, and variations to customize your bars to your liking. So, let's get started and discover how to make these irresistible candy bars!
Table of Contents
Origins of Whatchamacallit Bars
The Whatchamacallit bar was first introduced by the Hershey Company in 1978. It was designed to be a unique candy bar that stood out from the competition. The name "Whatchamacallit" was chosen to reflect the quirky and fun nature of the candy, appealing to consumers of all ages. The original bar featured a combination of chocolate, peanut butter, and a crispy rice center, quickly gaining popularity.
Over the years, the Whatchamacallit bar has undergone some changes in its recipe and packaging, but the core elements that made it a fan favorite remain intact. Today, many people enjoy making homemade versions of this candy bar, allowing them to experiment with different ingredients and flavors.
Ingredients for Whatchamacallit Bars
To make your own Whatchamacallit bars, you will need the following ingredients:
- 1 cup peanut butter
- 1 cup corn syrup
- 1 cup granulated sugar
- 4 cups crispy rice cereal
- 2 cups milk chocolate chips
- 1 tablespoon vegetable oil
Step-by-Step Recipe
1. Prepare Your Baking Dish
Start by greasing a 9x13 inch baking dish with cooking spray or lining it with parchment paper for easy removal.
2. Make the Peanut Butter Mixture
In a large saucepan over medium heat, combine the peanut butter, corn syrup, and granulated sugar. Stir continuously until the mixture is smooth and well combined. Remove from heat.
3. Add the Crispy Rice Cereal
Once the peanut butter mixture has cooled slightly, add the crispy rice cereal. Stir until the cereal is evenly coated with the peanut butter mixture. Pour the mixture into the prepared baking dish and press it down firmly to create an even layer.
4. Melt the Chocolate
In a microwave-safe bowl, combine the milk chocolate chips and vegetable oil. Microwave in 30-second intervals, stirring in between, until the chocolate is fully melted and smooth.
5. Pour the Chocolate Over the Cereal Base
Pour the melted chocolate over the pressed cereal mixture in the baking dish. Use a spatula to spread it evenly over the top.
6. Let It Set
Allow the bars to cool at room temperature for about 1 hour, or until the chocolate has hardened. For quicker setting, you can place the dish in the refrigerator.
7. Cut and Serve
Once the bars are set, remove them from the baking dish and cut them into squares or rectangles. Serve and enjoy your homemade Whatchamacallit bars!
Tips for Making Whatchamacallit Bars
- Make sure to press the cereal mixture firmly into the baking dish to ensure the bars hold together.
- Experiment with different types of chocolate, such as dark or white chocolate, for a unique flavor twist.
- Add toppings like crushed nuts or sprinkles on top of the melted chocolate before it sets for added texture and flavor.
- Store any leftovers in an airtight container at room temperature for up to a week.
Variations on the Recipe
1. Nut-Free Version
For a nut-free version, substitute peanut butter with sun butter or soy nut butter. This will give you a similar flavor without the allergens.
2. Vegan Whatchamacallit Bars
To make vegan Whatchamacallit bars, use dairy-free chocolate chips and maple syrup instead of corn syrup. Ensure that your peanut butter is also vegan-friendly.
Nutritional Information
While Whatchamacallit bars are a delicious treat, it's essential to be mindful of the nutritional content. Here's a general breakdown for one serving (1 bar) based on the ingredients used:
- Calories: 200
- Protein: 3g
- Fat: 10g
- Carbohydrates: 25g
- Sugar: 15g
Please note that these values may vary based on the specific ingredients and portion sizes used.
Storing Whatchamacallit Bars
To keep your Whatchamacallit bars fresh, store them in an airtight container at room temperature. If you live in a warm climate, consider refrigerating them to prevent the chocolate from melting. These bars can last up to one week, but we doubt they will last that long!
Conclusion
In conclusion, making your own Whatchamacallit bars is not only fun but also allows you to enjoy a delicious treat that you can customize to your liking. With our easy-to-follow recipe and helpful tips, you'll be able to create these crunchy and chocolatey bars in no time. We encourage you to try making them at home and share your creations with family and friends!
If you enjoyed this recipe, please leave a comment below, share it with your friends, and check out our other articles for more delicious recipes and baking tips. Happy baking!
Thank you for reading! We hope to see you back on our site for more tasty treats and fun recipes.
ncG1vNJzZmivp6x7rLHLpbCmp5%2Bnsm%2BvzqZmp52nqLCwvsRvZ2ivmJbBpLTAppicmZyhtrV5wZqprGWimrCqvMRnn62lnA%3D%3D